 AirSketch Pro User's Guide
Thanks for downloading AirSketch Pro!
Bookmark this page for a handy guide through all its features.
Setting Up the Connection
To use AirSketch for a live presentation, you will need:
- An iPad running AirSketch.
- A desktop/laptop computer running a standard web browser, connected to a projector.
For remote presentations, use a desktop sharing App (such as iChat or WebEx) on the computer instead of a projector.
First, connect your iPad and computer to the same WiFi network or router.
Open AirSketch and note the server address in the upper right (e.g. "http://10.0.1.14:8080").
Type this address in exactly in the browser address bar.
You should now see everything in the AirSketch window projected live in the browser.
Make sure the iPad and computer are on the same WiFi network, and the router allows "peer-to-peer" connections.
Most do by default, but some public networks may block this.
You can also set up an ad-hoc network to connect directly to your computer.
Server Settings
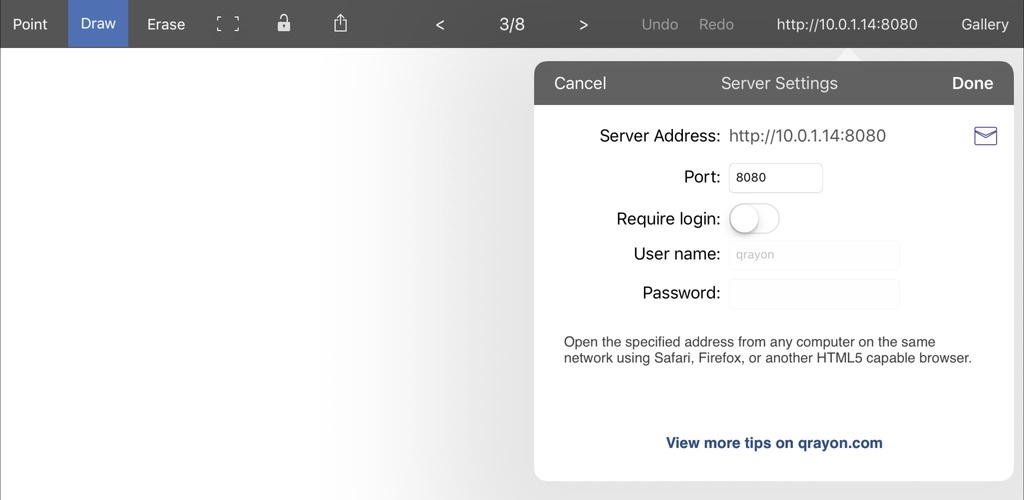
If necessary, you can change the port that AirSketch uses from the default 8080.
You can also set an optional password that must be typed in the browser in order to connect.
While AirSketch Pro can support multiple simultaneous connections, it works best when connected to just one computer at a time.
Email Server Address: Tap on the envelope icon to email the server address to yourself, to make copy/pasting easier.
Opening PDF Files
You can open PDF files in AirSketch Pro to present from any other App on your iPad, including directly from Keynote.
Open PDF files directly:
Tap the + button in the Gallery and pick "Import PDF", then select a PDF file to import.
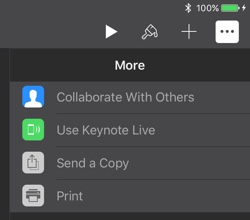
Opening Keynote Decks: Open your deck in the Keynote app, tap "Send a Copy" from the Share Menu. Pick PDF as the format, then select AirSketch Pro.
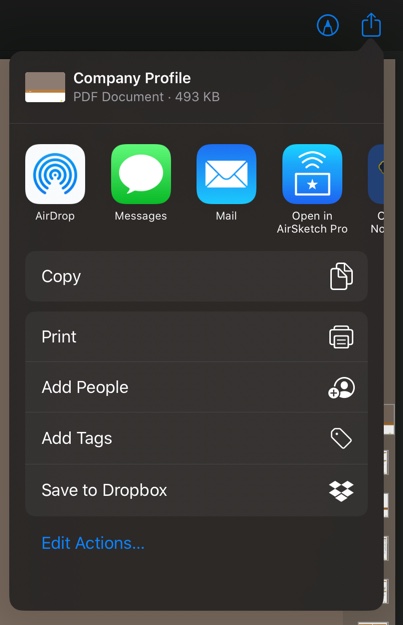
From the iOS Files App:
Open a PDF file (with a .pdf extension) in the Files App, then tap on the "send-to" / action menu and select "Open in AirSketch Pro".
If you don't see the option, scroll right, then tap "More".
The Toolbar
Now that you have AirSketch Pro up and running, here's a rundown of all the tools you can use during your presentation:

Point: The first tool is the virtual laser pointer. When active, a red dot will appear above your finger.
Draw: Select the Draw tool in order to write or draw on the slide.
Tap the Draw button again when selected to toggle the palette.
Hilight: Select Hilight in the palette to switch to the hilighter, which draws a transparent layer of color to call out parts of the presentation.
Lines: When selected, the Lines tool allows you to draw straight lines and basic shapes such as rectangles and ovals.
Fixed-zoom: Tap the Fixed-zoom button (to the right of Erase) to fix the projected view to the current viewport.
A green rectangle indicates the portion of the screen that is projected.
This is handy to project the full screen, while zoomed-in to write more finely.
Also use this to annotate other parts of the page, while your audience is still copying notes from one section.
Freeze-frame: Tap the Freeze-frame (lock) button to freeze the currently projected view. This is handy to allow your audience to catch up as you prepare the next slide.
Pen width: Drag the slider to adjust the width of the pen. You can use the finest pen setting and zoom in to have a large effective workspace for writing.
Colors: Tap on a color in the palette to select it. You can also scroll the color palette left and right.
Customize Colors: Tap on the selected color again to customize it. You can also tap on the hex color code in the color editor to set it directly.

Erase: Tap on the Erase button to enter Erase mode. Use this to remove ink from the page.
Erase Ink or Clear All: Tap on the Erase button again when selected to see the Erase menu. From here you can erase all ink on the page, or clear it completely.
Action Menu
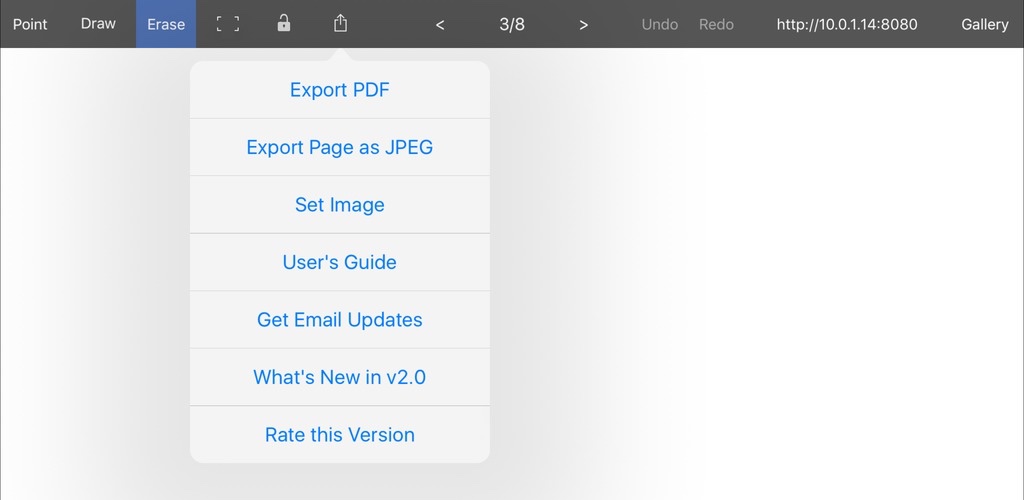
Export PDF: Select this to export the current presentation with your annotations to PDF.
This will open the preview.
From the preview, you can send the PDF file to another App, email it, or use AirDrop to transfer it to a Mac.
Export Page as JPEG: This works similarly to exporting a PDF, but as a high resolution JPEG, just for the current page.
Set/Change Image: Use this to replace the current page image with one from the Cameral Roll.
Page Manager
Paging: Tap on the '<' and '>' buttons to change the page.
You can also swipe from the left and right edges of the screen.
Tap on the page number to bring up the Page Manager.
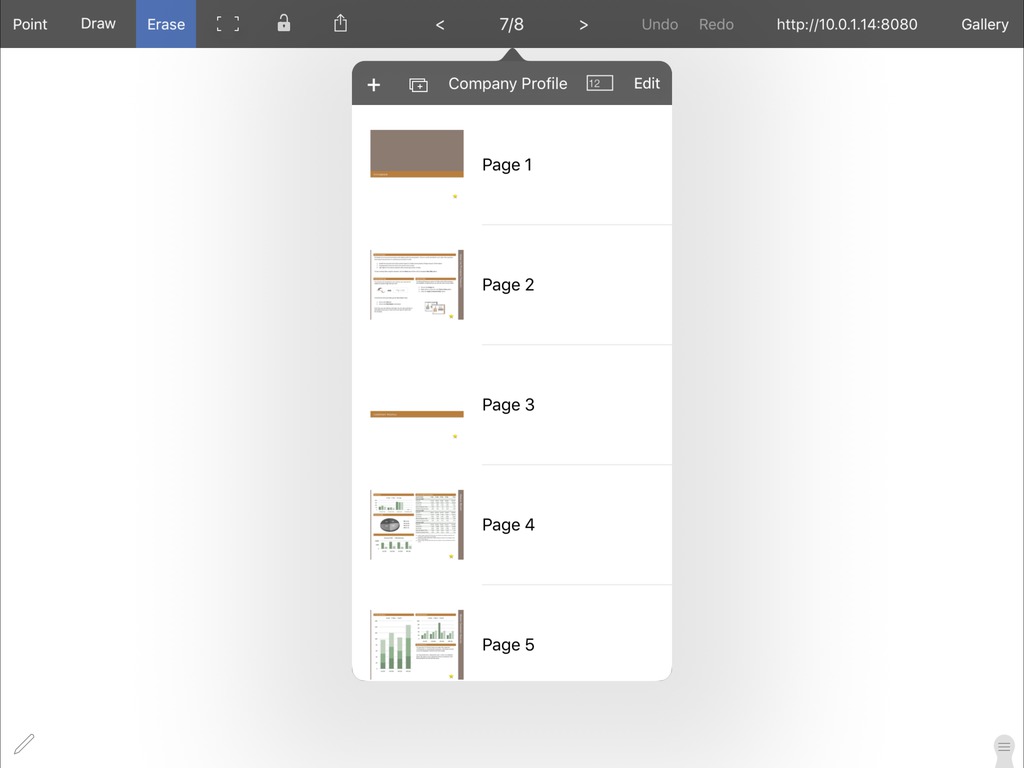
Add Page: Tap '+' to add a new page.
Duplicate Page: Tap the Duplicate-page button (to the right of the + button) to duplicate the current page.
Jump to Page: Tap the button to the left of the Edit button to jump to a specific page.
Delete Page: Swipe a page, or tap edit then delete (-) to delete a page.
Rearrange Pages: Tap edit, then drag pages up and down to arrange them.
The Gallery
Tap on the Gallery button to see all the presentations save in AirSketch Pro.
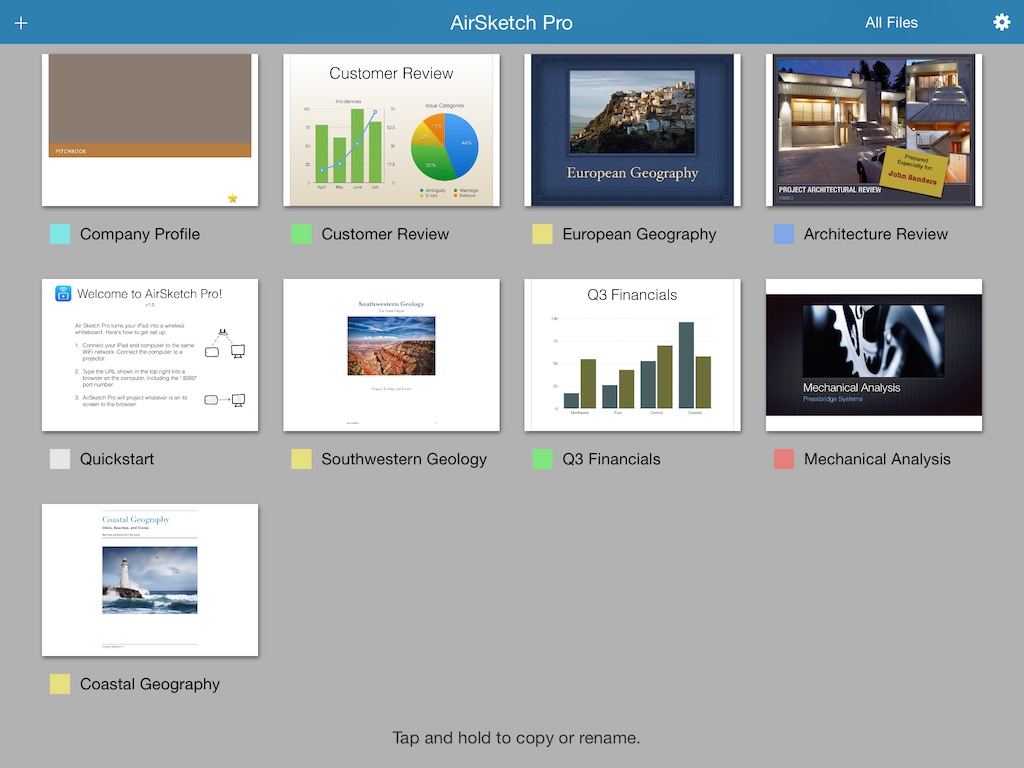
File Actions: Tap on a file name, or long-press on it to bring up a menu of actions.
From here you can Rename, Duplicate, Delete, or change the category of a File.
File Categories: Instead of folders, AirSketch Pro uses a color-coded category system to help you organize your files.
You can set the category of a file by tapping on the colored square to the left of its name, or via the file action menu.
Tap on the "All Files" button in the top right of the Gallery to only show files in a particular category.
Custom Category Names: You can customize your category names in the Settings screen by tapping on the gear icon at the right side of the toolbar.
Presentation Tips & Tricks
AirSketch Pro is designed to be a seamless extension of your existing presentation workflow.
Create your presentation in Keynote or PowerPoint as normal, then export it as a PDF to AirSketch Pro for practice and live presenting.
Engage with Slides + Annotations: When preparing your slides, leave room for annotations.
Your audience is going to pay extra attention to the part you add in during the live presentation.
Call out Key Points: Use annotations to hilight the key points as you walk through them.
This works especially well for visual information such as a chart or map.
Use Live-Zoom: You can also use zooming to call attention to particular parts of a page or image.
It is also a good way to add detailed annotations or notes to a particular point, that will be part of the final PDF.
Use AirSketch Pro as a Wireless Whiteboard: In addition to projecting prepared slides, you can use AirSketch Pro as a blank wireless whiteboard.
Just create a new file in the Gallery to have a blank multi-page flipchart.
You can also insert additional pages into an existing presentation to switch to a whiteboard.
This is handy to answer audience questions on-the-fly without disrupting the flow of your presentation.
Share the Final PDF: When you are done with your presentation, you can email or upload your presentation including annotations right away from AirSketch Pro.
If you have a regular class or session, you can send the PDF to a public folder on Dropbox to make it available instantly.
Stay In Touch!
Thanks for downloading AirSketch Pro! I hope you find it useful in your work. To get a heads up on new releases and special offers, follow us on Twitter and sign up for our very low traffic email newsletter here.
Back to the AirSketch Pro homepage.