 Slidecast User's Guide
Thanks for downloading Slidecast!
There are many advanced and subtle features to discover.
Bookmark this page as a handy reference.
Slidecast and Slidecast Pro
Note: The Standard Edition of Slidecast has a subset of the features listed here.
Use the in-app upgrade to get the free trial of Slidecast Pro.
The additional features in Slidecast Pro include:
- Custom pen controls with a draw-behind highlighter and shape recognizer,
- A fully customizable color palette,
- Text entry,
- Option for 4X larger pages, with custom background colors,
- Export projects to PDF,
- Color separation,
- And more.
The Gallery
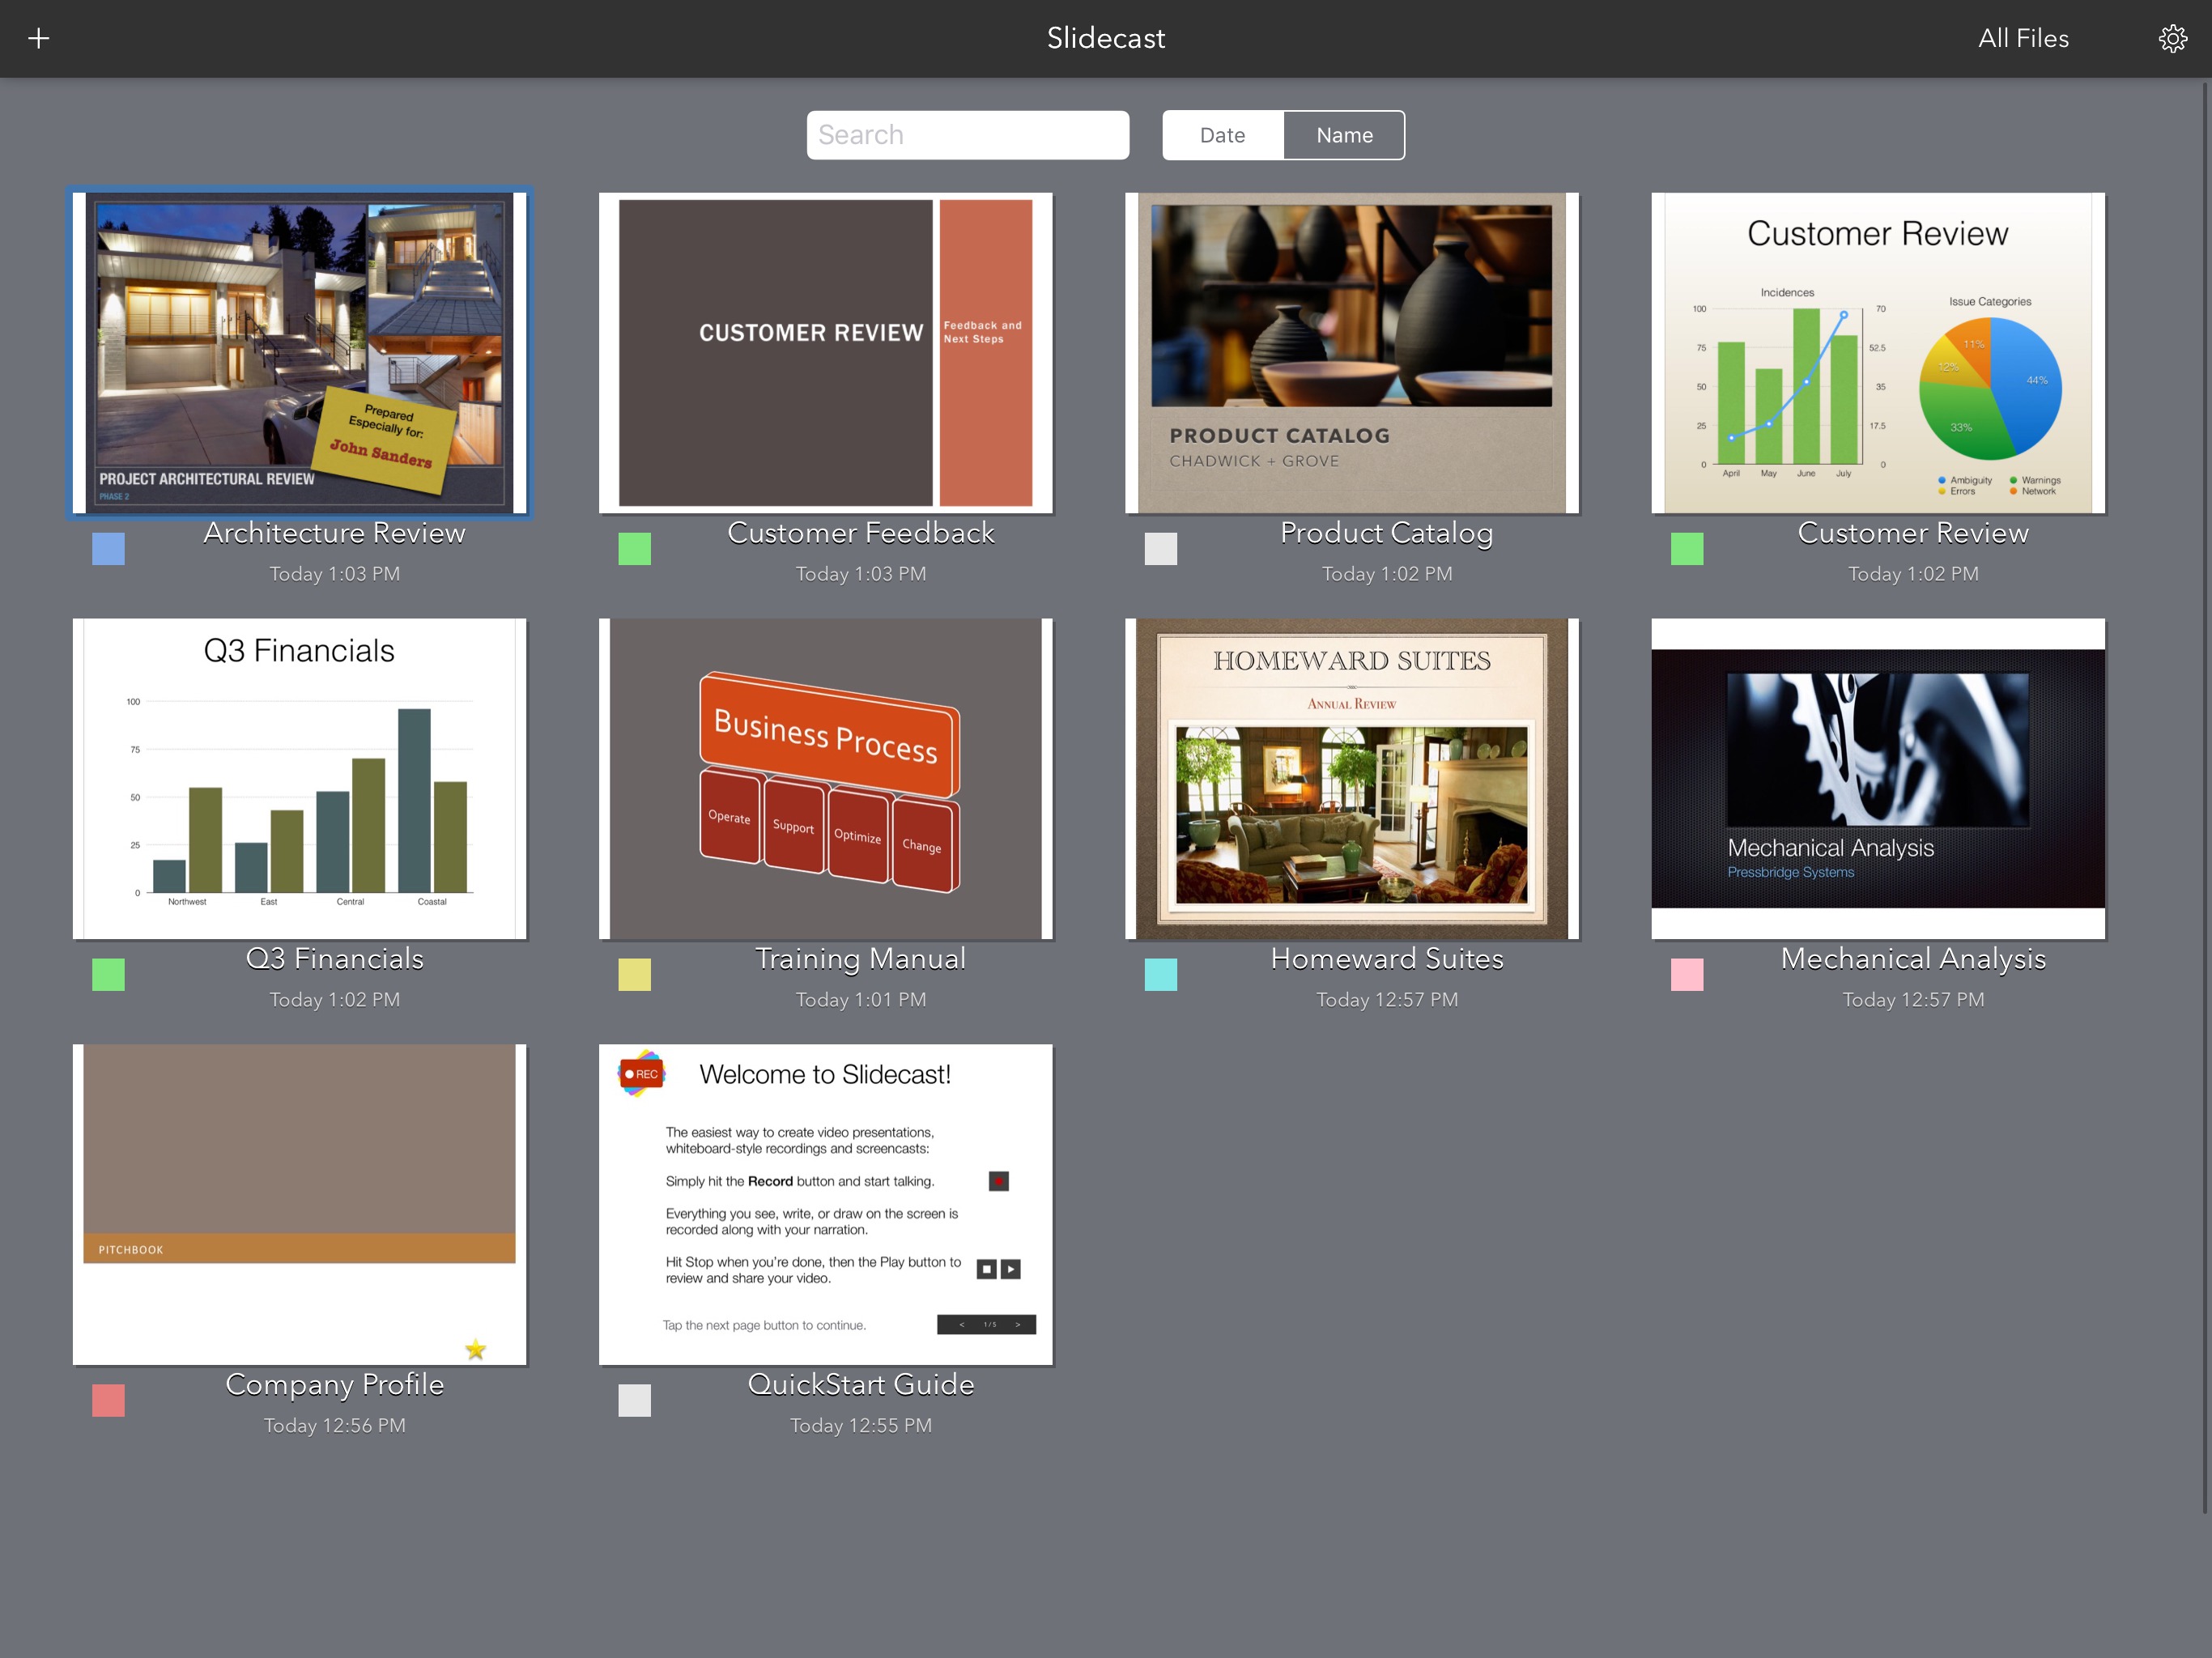
Slidecast opens to a list of available projects.
Tap on a project to open it.
Sort and Search.
Scroll up to see the sort and search controls.
Type in a partial name to show matching boards.
Creating new Projects.
Tap on the '+' icon in the top left to create a new project.
You can create a blank project, or import a PDF from iCloud or other file managers.
Renaming and deleting projects.
Tap on the file name, or long-press on a project, to show additional operations.
Color-coded Categories.
Each project can be tagged with a category.
Tap on the color tab to the left of the file name to set its category.
Tap on the "All Files" button in the toolbar to filter files by specific categories.
Customize Category Names.
Prefer something more evocative than "Category A"?
Tap on the gear icon to customize their name and access additional App Settings.
The Editor
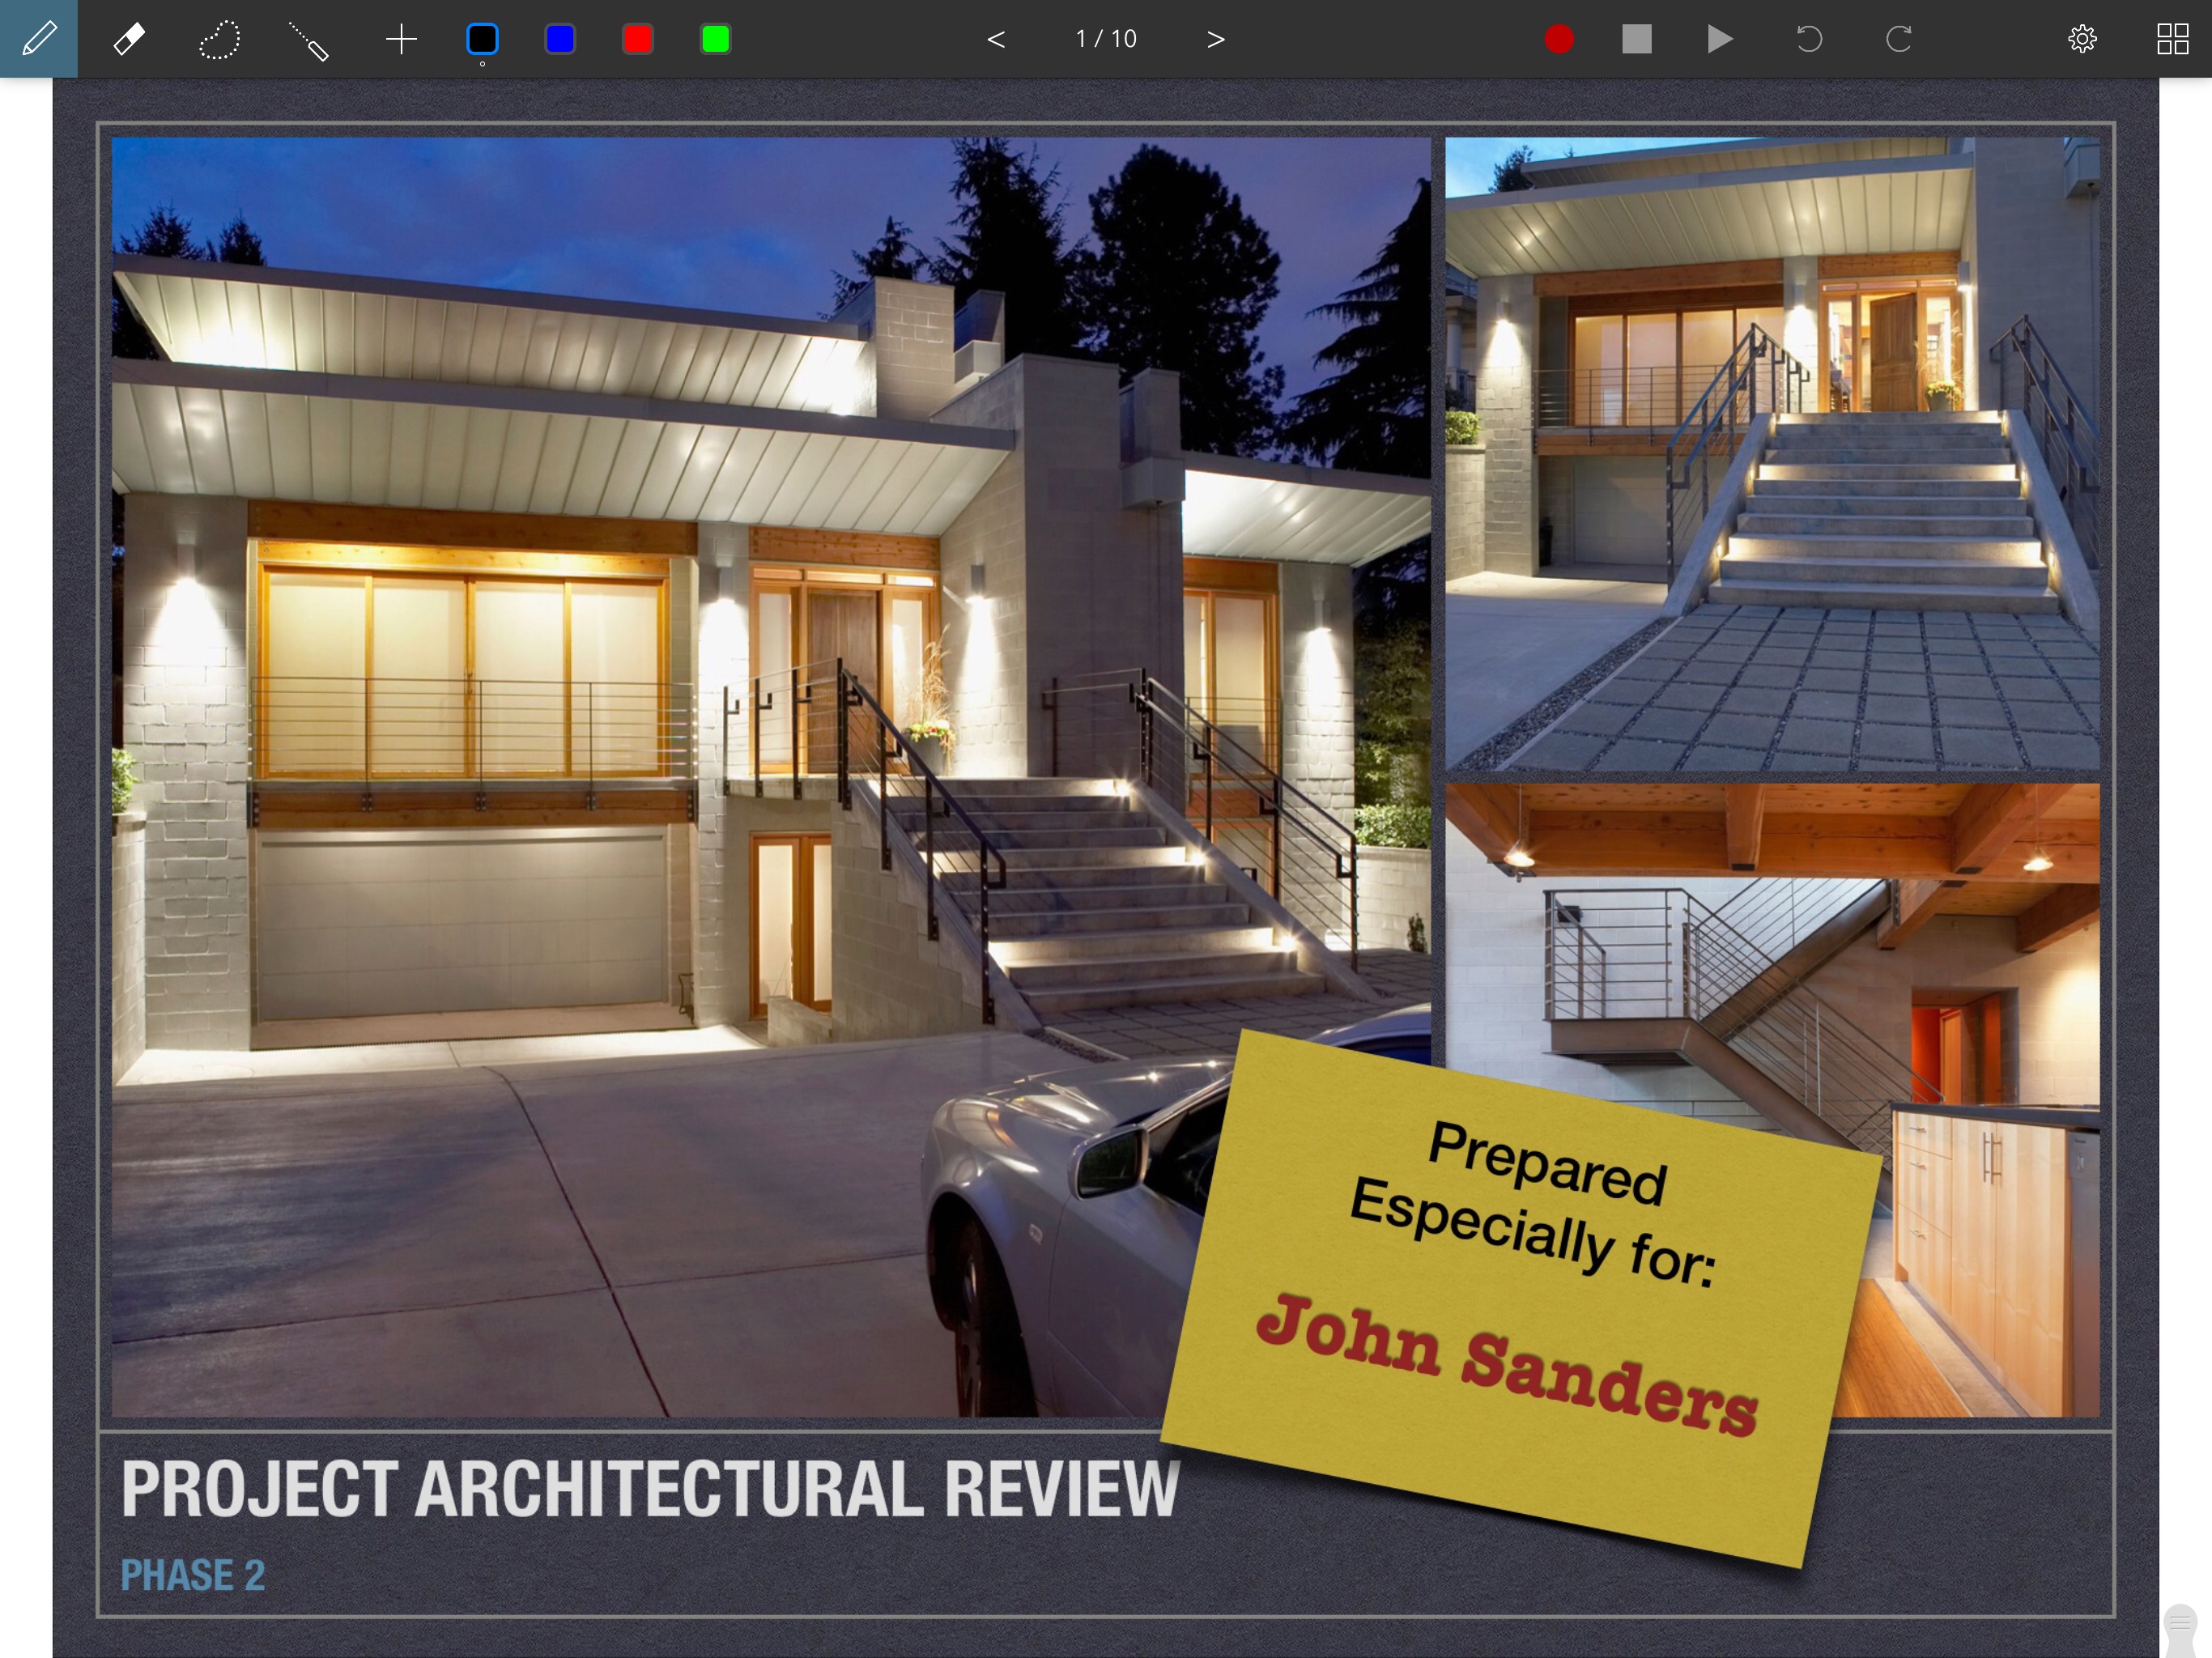
The Editor appears when you open a project.
The Editor Toolbar

Tap on the pen icon ( ) to enter Draw Mode.
You can use your finger, a stylus, or an Apple Pencil to write and draw on the page.
) to enter Draw Mode.
You can use your finger, a stylus, or an Apple Pencil to write and draw on the page.
Pencil-Only Drawing Mode:
If you have an iPad Pro with the Apple Pencil, you can toggle on the Pencil-Only Drawing Mode using the Pencil button that appears at the lower left of the screen when an Apple Pencil is detected.
Tap on the pen icon again when it is selected to toggle the Drawing Palette.
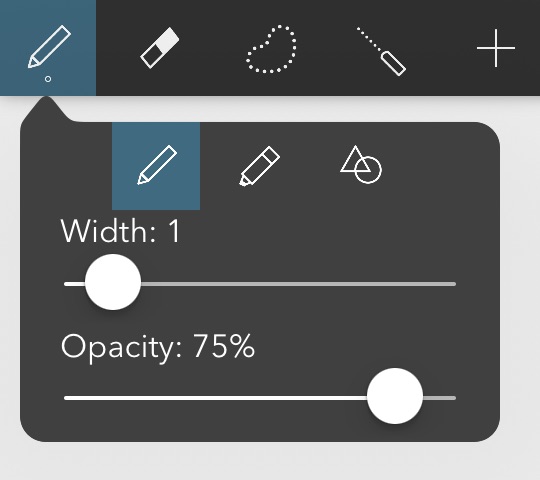
There are three drawing tools: The Pen, Highlighter (draw behind), and the Shape Recognizer, represented by the three buttons at the top of the Drawing Palette.
Draw Behind Highlighter.
Use this tool to draw behind existing ink.
Very handy for adding background splashes to call out particular elements, or adding shadows.
Shape Recognizer. Tap the Shape button to activate the Shape Recognizer.
As you draw, the editor will attempt to recognize basic shapes and draw straightened versions automatically.
It recognizes lines, circles, triangles, squares, and rectangles.
Pen opacity.
Change this to make the ink more opaque or transparent.
Erasing Ink.
Tap on the Eraser icon ( ) to enter Eraser Mode.
Tap on the Eraser icon when it is selected to clear the page.
) to enter Eraser Mode.
Tap on the Eraser icon when it is selected to clear the page.
Selecting Ink.
Tap on the Selection icon ( ) to enter Selection Mode.
Lasso ink to select strokes.
Drag the selection to move the ink.
Drag the round rotation grip at the top of the selection to rotate ink.
Drag the resize grip in the bottom right of the selection to resize it.
) to enter Selection Mode.
Lasso ink to select strokes.
Drag the selection to move the ink.
Drag the round rotation grip at the top of the selection to rotate ink.
Drag the resize grip in the bottom right of the selection to resize it.
You can also move, resize, and rotate ink by dragging the selection with two fingers.
Color Separation.
When you select ink of more than one color, the list of selected colors appear at the bottom left.
By default, ink of all colors are selected, but you can tap on one or more colors to select just those colors.
This is handy to move or delete ink that's behind, without disturbing the foreground.
Use this to change highlights or shadows.
Copy, Cut, and Paste Ink.
Once you've selected some ink, tap inside the blue selection area to show ink edit options.
Tap copy to copy all selected strokes (which may extend outside the selection area).
To paste copied or cut ink, tap outside the blue selection area once to clear it, then tap again to show the paste option.
Pointer:
Tap the Point button to enter the laser pointer mode. A red pointer will appear wherever you point with one finger.
This is useful for calling out parts of the page as you narrate.
Photos and Images
Tap the Add button, then select "Add Photo" to select a photo from your albums.
Tip: If you had denied access to photos the first time, you can re-enable it by going to the iOS Settings App -> Privacy -> Photos, and turning the setting on for Slidecast.
You can also copy images from external Apps such as Dropbox or Mail.
Simply copy the image from that App, switch to Slidecast, then paste it in.
Text
Tap the Add button, then select "Add Text" to enter typed text. Alternatively, enter Selection mode, tap on the canvas, then tap "Add Text" in the context menu.
Text is resized and positioned just like photos. To edit existing text, first select it, tap on the selected text and pick "Edit Text" from the context menu.
Color Palette
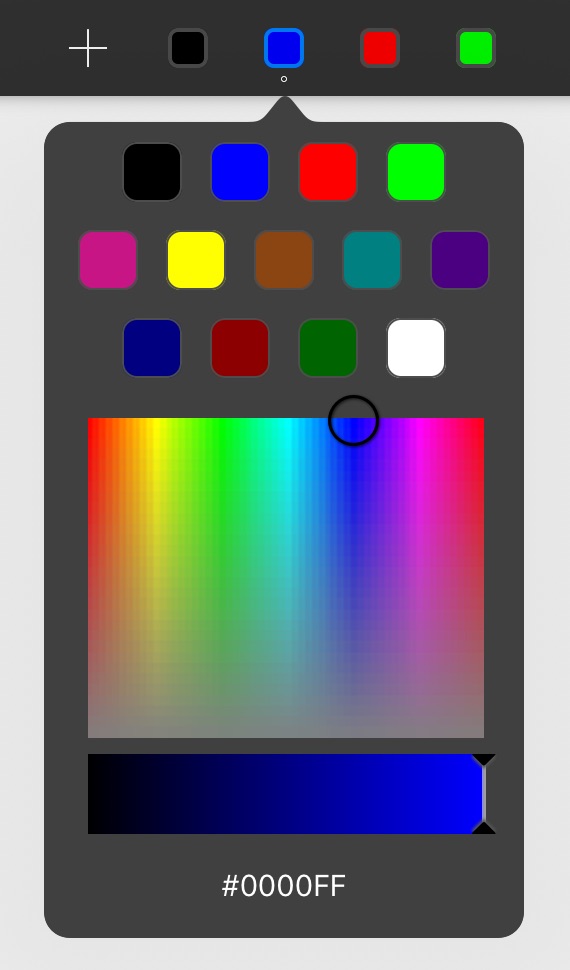
Tap on any of the four color wells to change the ink color.
Tap on the selected color well again to open the color customizer.
Pick from one of the presets, or make any color you want.
Tip: Tap on the #RGB value to enter it directly.
Recording Videos
The Recording controls are on the right side of the toolbar.
Tap the Record button to start recording.
Everything on the visible canvas is recorded, in sync with your voice.
Tap Pause to momentarily pause the recording.
This is useful to skip some drawing time.
You can also use it to produce stop-motion effects.
Tap Stop to (you guessed it) stop recording.
You can then tap Play to review your recording.
Each time you record, a new scene is added to the end.
The individual scenes can be later rearranged or deleted in the Scene Editor.
Image Operations
In Select mode, tap on a picture to select it, then tap on it again to bring up the image context menu.
Back and Front: Tap the Back or Front context menu options to move the image backwards or forwards relative to other images.
Ink always appears above any images.
Locking Images:
Tap Lock Image to lock it. The image now can no longer be selected. This is very useful to use images as backgrounds for the page or parts of it.
For example, you can add a picture of a grid or custom stationery and lock it in place. You can now add other images and move them around without affecting the locked background.
To unlock a locked image, just tap on it again and select unlock Image.
Pages
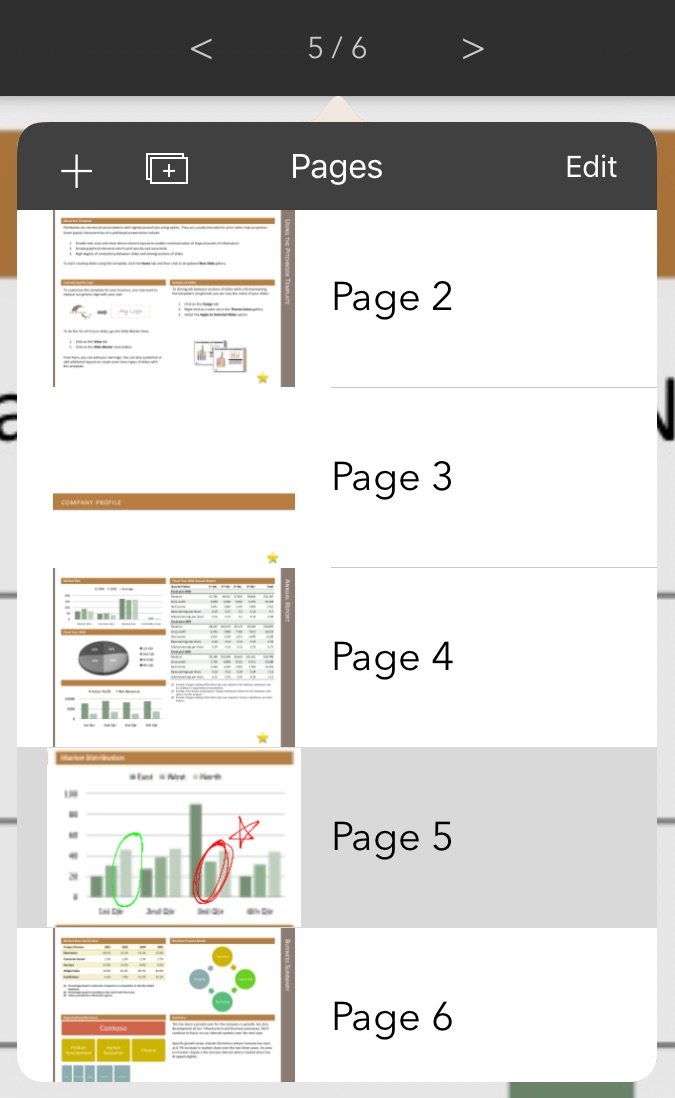
Paging:
Tap on the left and right arrow buttons besides the page number at the bottom of the screen to flip between pages.
Paging past the last page automatically adds a new page.
Page management:
Tap on the page number to bring up the page management tools.
Use this to jump to a specific page.
Tap edit to rearrange or delete pages.
You can also duplicate a page.
Wrist Guard
Tap the gray tab at the bottom right of the screen to call up the wrist guard. Drag it up and down to adjust.
Rest your wrist on this area while doing a lot of writing to avoid creating stray marks.
Camera Lock
The Camera Lock is a powerful and flexible tool that allows you to achieve many different effects.
The basic operation is simple:
Tap the Lock button to lock the camera's view on the currently visible part of the canvas.
This is indicated by a green frame.
From this point on, the camera only records what's in that frame, even if you zoom and pan elsewhere on the same page.
Tapping Unlock while recording will smoothly pan the camera's view back to the currently visible canvas.
One way to use this is to lock the camera while zoomed out, then zoom in to write more finely. Your audience can keep their attention on the big picture, while you fill in small details.
Another common use is to smoothly steer your audience's attention to different parts of the page.
For example, navigating from one key point to another,
or zooming out quickly to show them the big picture.
Another useful technique is to prepare illustrations outside of the camera's view, then move them into frame.
This is like moving different actors or props onto a stage, and is an effective storytelling technique.
Tap and hold the Lock button to reveal additional operations:
- Reset View: Resets the current page's view to the center.
- Zoom to Lock: Changes the current visible canvas to the active camera lock frame.
- Lock on Background: Locks the camera to include all locked images. Very handy for imported presentations.
- Re-Lock Camera: Restores the camera lock to the last locked frame.
Tip: Each page remembers its last camera lock frame, allowing you to Re-Lock the camera to it in order to continue scenes seamlessly.
You can duplicate a page to copy its contents as well as its last camera lock information.
Take your time to play around with the camera lock. You'll find that you can create pretty sophisticated effects, and tell a more engaging story with it.
Editor Options
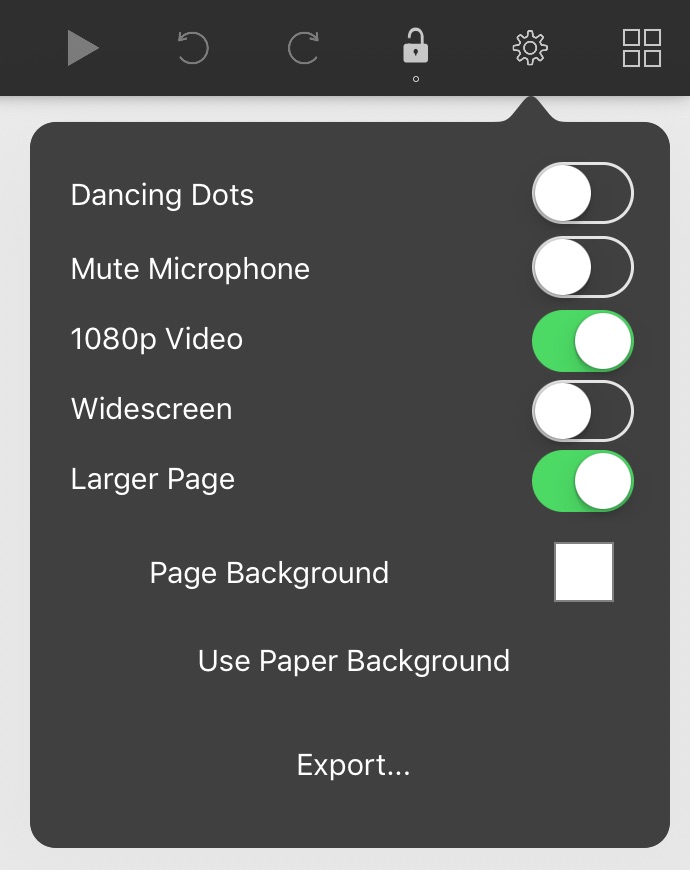
Tap the Settings button to change the Editor options.
Dancing Dots: Turn on the Dancing Dots effect to give your drawings an element of liveliness, even when nothing is changing on the screen.
Mute Microphone: Sometimes, you may want to record scenes without sound. This is the control that let's you do that.
1080p Video: By default, Slidecast records at a high 1080p resolution. Turn this setting off to produce 720p videos.
This will result in smaller files at the expense of lower resolution.
Widescreen: Because the iPad screen is narrower than a standard widescreen video, additional content will appear at the sides of the video in widerscreen mode.
Turn this setting off to produce "pillar-boxed" videos instead where the sides are blacked out.
Tip: To record an imported widescreen presentation, turn on this setting, then tap-and-hold on the Lock button and select Lock on Background.
This will fix the camera on the imported slides.
The Scene Editor
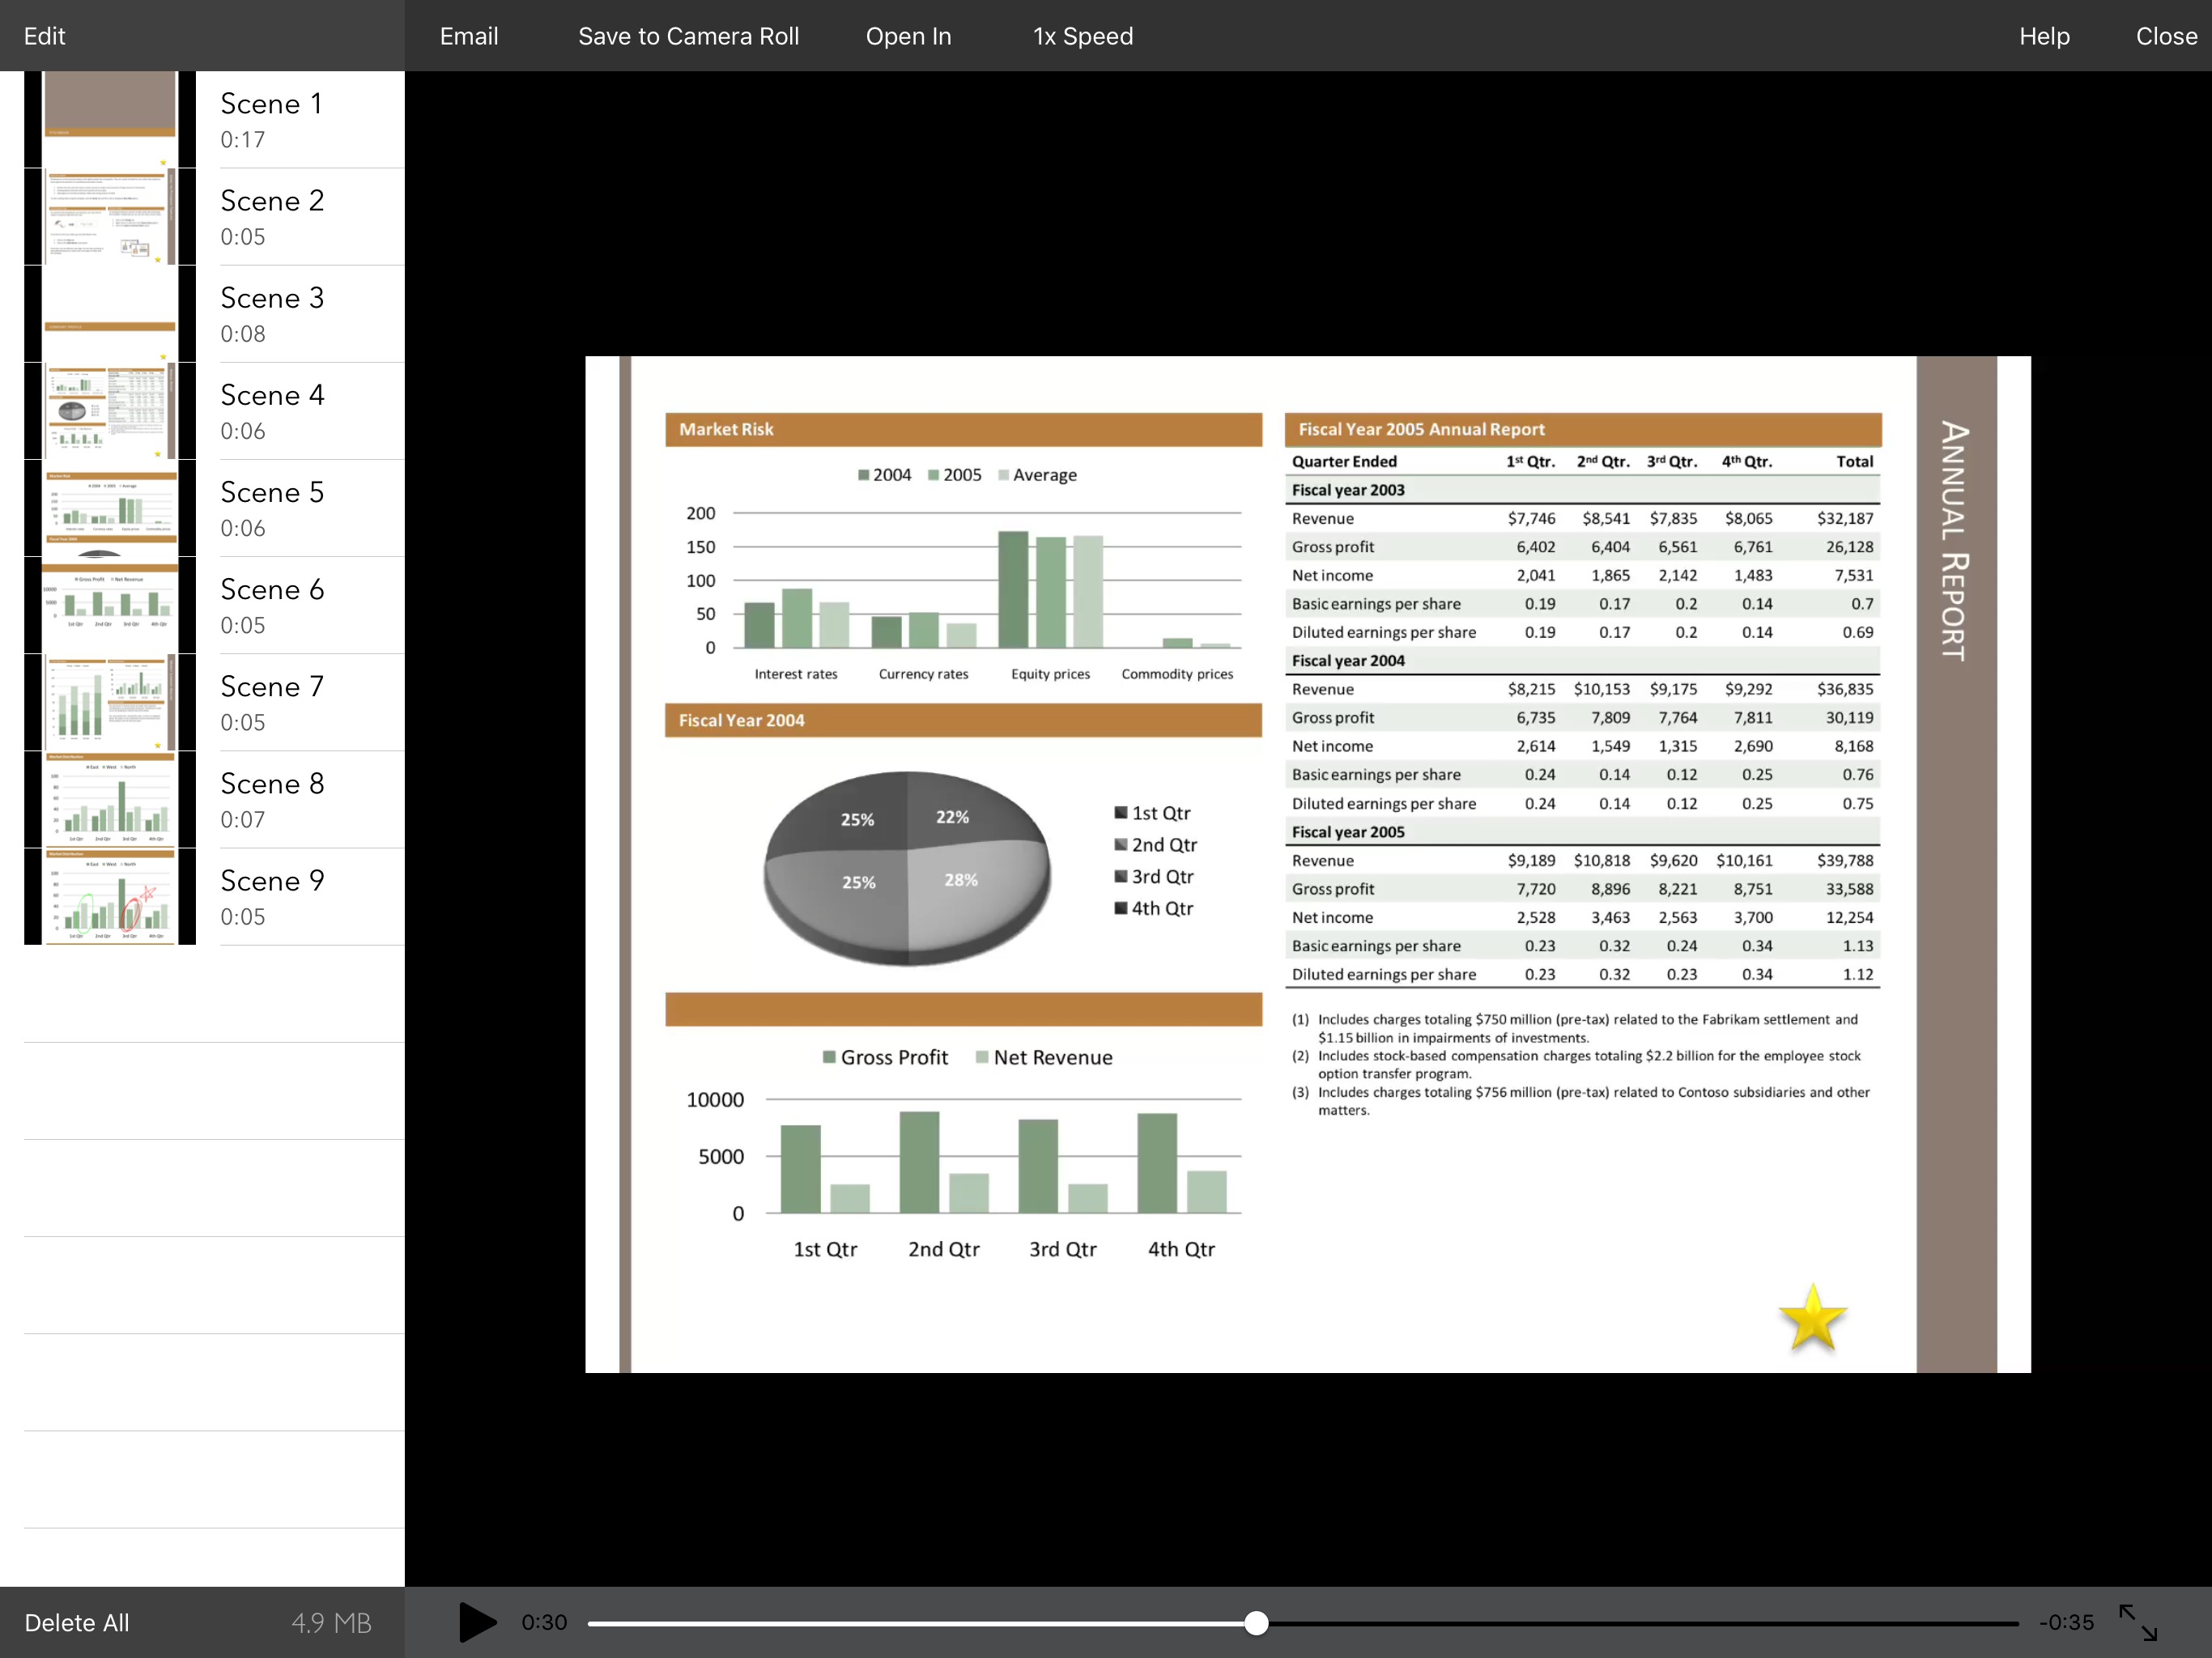
Tap the Play button to open the Scene Editor.
Video Speed: Tap it to boost the video speed by 25%, 35%, 50%, or 100%.
Add a slight speed boost to give an extra little pep to longer presentations or lectures.
This setting is sticky, but doesn't change the source video, so you can change it as often as you like.
Tap Edit to change the order of scenes and delete individual scenes.
You can also swipe across a scene to delete it.
From here, you can also email your complete video, or save it to the camera roll.
Sharing your Videos
Share on YouTube: iOS allows you to share any video to YouTube directly from the built-in Photos App.
First save your video to the camera roll, switch to the Photos App, then select YouTube from the Actions menu.
Share on Vimeo: Vimeo is another video service that we love.
To upload to Vimeo directly from your iPad, download the Vimeo App from the App Store, and use it to upload saved videos from your camera roll.
Sign into Vimeo in the Settings App, then upload directly to Vimeo from the Photos browser.
Share on Facebook: Similarly, to share your video on Facebook, first save it to your camera roll.
Now open the Facebook App, tap the Photo button, and select your saved video.
Sign into Facebook in the Settings App, then upload directly to Facebook from the Photos browser.
Share on Dropbox: You can also use Dropbox's iPad App to upload videos directly from your camara roll.
After saving your video to the camera roll, open the Dropbox App.
Navigate to the location within your Dropbox where you would like to put these files,
then tap the + menu button in the top-right corner of the screen and choose Upload here.
You can find more details on Dropbox's site.
Twitter: Once you've uploaded your video to YouTube or Vimeo, tweet the link to your followers.
Share on your company server: You have full control over the video files that are generated.
You can upload them to the server or service of your choice either directly from your iPad, or by first copying them to your PC or Mac.
Editing and Enhancing your Videos
While Slidecast includes all you need to record and make basic edits to you videos, sometimes you want to go the extra mile.
Both YouTube and Vimeo now support adding music soundtracks to your uploaded videos and applying visual filters.
Check out the "Enhancements" setting in these services for more information.
For more control, you can edit your completed videos in a third party App such as iMovie.
With iMovie, you can re-cut your scenes, add theme music, and apply other visual effects.
Importing PDFs
You can open PDFs in Slidecast from Mail or third party Apps.
When viewing the PDF, tap the "Open in..." button and select "Import with Slidecast".
You may have to scroll the list of options to find Slidecast in the list.
Tip: Tap and hold on an icon to rearrange it in the list.
This will create a new project with an image of each page of the PDF.
These images are locked by default, but you can tap on them in Select mode to unlock and reposition them.
You will typically want to import PDFs that are generated by a presentaion App such as Keynote or PowerPoint.
The landscape orientation works best with Slidecast.
Tip: If you have an oddly-sized or very detailed PDF, a useful tip is to first import it into your presentation App,
rearrange and resize the pages to fit your presentation, then export that deck to a PDF into Slidecast.
Importing Keynote Decks Directly
You can even open PDF decks directly from Keynote for iOS:
- In Keynote, tap the "..." button at the top right(elipsis/three-dots icon) and select "Send a Copy".
- Choose the PDF format.
- Select "Slidecast" from the list.
- Tip: You can tap and hold to rearrange the apps in the list.
Backing-Up Your Files
Your data is very valuable. Please take a few simple steps to make sure you don't lose something important.
While automatic iCloud backups (if you have turned them on) do back up all your documents and app settings, the thing is that you need to restore your entire device to retrieve any inadvertently deleted files.
The truth is that nothing can replace manually backing up your important files regularly.
We strongly recommend using iTunes File Sharing to routinely copy your books to a secure backup location.
Back to the Slidecast homepage.